Exporting tables from MS Access to SQL Server 2008
Here are the steps to export it to SQL Server 2008:

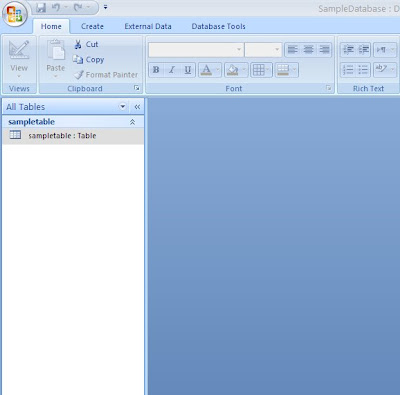
1. The open the MS Access database and select the table that you want to export.
 2. Goto Database tools from the main menu.
 3. Click SQL Server from the Move Data pane.
 4. Select the "Use Existing Database" option and click next.
 5. Click new and create a new DSN Name.
 6. Select SQL Server from the list box and click next.
 7. Type a name that you want to be as your data source name. Then, Click next and it will show you a confirmation message box.
 8. Click finish if it is confirmed.
 9. Give a description whatever you like and select the server name from the drop down menu. Server name is the name where your database resides. Then, Click next.
 10. Leave default and press next.
 11. Leave default settings and click next.
 12. Leave default settings and click next.
 13. If you want to test your connection then you can click test data source button in the below.
 14. This shows that your connection is successful.
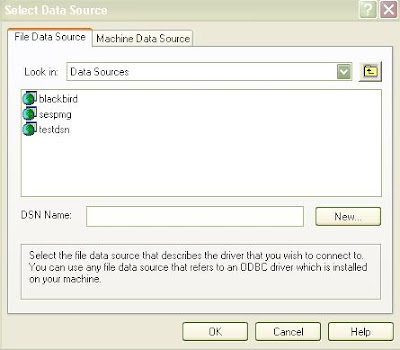
 15. Select your newly created data source name from the list and click OK to continue.
 16. Select the table name and click the single arrow in the middle and press next button to proceed.
 17. This will look like this for one table.
 18. If you want to configure then you can change some of the options, but here I go with the default options and click next.
 19. Go with the default options and click next.
 20. Click finish to execute your exporting.
 21. After completing your execution you will see your MS Access table in SQL Server 2008 Database.

1. The open the MS Access database and select the table that you want to export.
 2. Goto Database tools from the main menu.
 3. Click SQL Server from the Move Data pane.
 4. Select the "Use Existing Database" option and click next.
 5. Click new and create a new DSN Name.
 6. Select SQL Server from the list box and click next.
 7. Type a name that you want to be as your data source name. Then, Click next and it will show you a confirmation message box.
 8. Click finish if it is confirmed.
 9. Give a description whatever you like and select the server name from the drop down menu. Server name is the name where your database resides. Then, Click next.
 10. Leave default and press next.
 11. Leave default settings and click next.
 12. Leave default settings and click next.
 13. If you want to test your connection then you can click test data source button in the below.
 14. This shows that your connection is successful.
 15. Select your newly created data source name from the list and click OK to continue.
 16. Select the table name and click the single arrow in the middle and press next button to proceed.
 17. This will look like this for one table.
 18. If you want to configure then you can change some of the options, but here I go with the default options and click next.
 19. Go with the default options and click next.
 20. Click finish to execute your exporting.
 21. After completing your execution you will see your MS Access table in SQL Server 2008 Database.


nice work....that works in my case.....keep it going man!
ReplyDelete